Osiris
Osiris is TU Delft's educational administration system. Lecturers can access Osiris through this link.
For students, the OSIRIS platform is integrated into MyTU Delft, where they can register for courses, sign up for exams, and view their published grades.
For more information regarding examinations, please refer to this page.
If you have additional questions, visit the FAQ section for further assistance.
How to register and sign test results
In the next few paragraphs, a step-by-step description is provided on how to register marks on a test and how to sign these marks digitally. To sign marks, you need to register a mobile number in E-service. Let us start there.
-
Set the mobile number used for this purpose, according to the following format:
[Countrycode (+31)][space][Mobilecode (6)][space][Number]This phone number has to meet two conditions:
- It has to be unique.
- Previous used numbers cannot be reused.
-
Go to https://osidoc.tudelft.nl and login with your NetID.
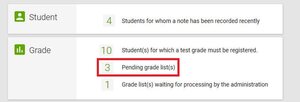
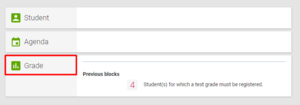
After successfully logging in, you will automatically see a dashboard. This is the central place for an OSIRIS Lecturer. The dashboard is created to give a simple overview. This way you can easily see how many students are waiting for test results or the number of grade lists that still need to be signed.
The numbers are based on the students who successfully registered for the exam, this excludes last-minute students.
To start entering marks for the waiting students, press the number (in this case 10). This will take you to a new screen.
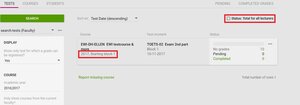
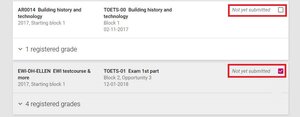
This new screen shows the different tests (ordered by course) for which you can register results. Per test you can see the current status. No grades stands for the number of enrolled students that still have to receive their grade. Pending is the number of grades added that still need to be signed. Completed stand for the number of grades that are signed. Grades only become visible to students once completed.
If a course has multiple lecturers, the status might be incorrect. Make sure to check the Status: Total for all lecturers box.
In order to enter new results or sign grades, click on the test (see screenshot above) in the appropiate starting block. This will take you to the screen where you can register marks for students who registered for the exam and do not have a completed grade yet.
Take the following steps to register a grade for these students:
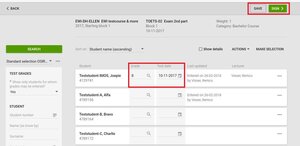
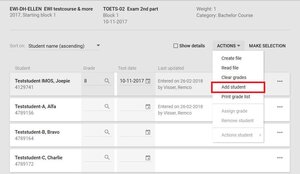
- Enter the Grade* and Test date for the desired student (see screenshot below)*. Type the result in the text field next to the loop icon. The loop icon only shows your other result options apart from grades, like O (insufficient), V (sufficient) or NV (did not show up).
- If you enter grades for multiple students, the date will be filled out automatically.
- If all grades are entered, click on Save to save your progress (see screenshot below).
The results are now Pending and waiting to be signed. During this period, the results are concept results. This means that they can easily be changed by the teacher and that they cannot be seen by students.
Click on Sign to sign the grades directly. You will see two possibilities to sign:
- Sign Electronically = Our option of choice: for signing directly with an SMS Code.
- Sign Manually = Our back-up option: a PDF is generated, which has to be e-mailed to the Study Programme Administration of your faculty.
It is also possible to sign the results later on. This will be discussed in the paragraph: "Sign results later".
-
In OSIRIS lecturer an Excel file with results can be uploaded. This makes it easier for instructors to upload results in bulk or make changes to multiple students. To upload an Excel file, take the following steps:
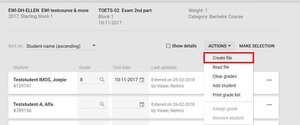
- After selecting your test, click on Actions and Create file. This will create an Excel file.
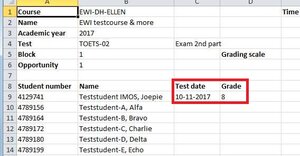
- Open the created file. At the top of the file, you will see information about the test. This information is filled in automatically. Do not change this information. The important section can be found underneath the test information.
- Check if the list of students is complete and add missing students to the list by adding their student number. (When you are adding students in the Excel file, you do not have to add the student’s name. Osiris will automatically find the name while reading the file).
- Register the test date* and the grade of the students. Make sure all the students in the list have a test date and test result. Students who did not attend should receive NV as result (NV = "niet verschenen" / "did not attend"). Other columns, like Subject and Topic should be left empty.
* For written tests the test date is the date on which the test was taken; for practical exercises/assignments/(homework) assignments etc., the test date is the date of the last submission by the student.
- Save the file on your hard-drive.
- Go back to the selected test, click on Actions again, and click on Read File.
- Select the saved file and click on Read File.
- Click on Sign to sign the grades directly. You will see two possibilities
-
- Sign Electronically = Our option of choice: for signing directly with an SMS Code
- Sign Manually = Our back-up option: a PDF is generated, which has to be e-mailed to the Study Programme Administration of your faculty
It is also possible to Sign the results later
-
You can import a text file into Osiris. The text-file should contain two columns, divided by a <tab>:
- Student number <tab> grade
The file should look like the screenshot below.
- Save the file on you hard-drive.
- Go to the selected test, click on Actions again, and click on Read File.
- Select the saved file and click on Read File.
Click on Sign to sign the grades directly. You will see two possibilities:
- Sign Electronically = Our option of choice: for signing directly with an SMS Code.
- Sign Manually = Our back-up option: a PDF is generated, which has to be e-mailed to the Study Programme Administration of your faculty.
It is also possible to Sign the results later.
-
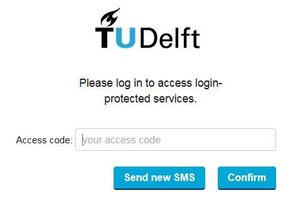
After clicking on Sign electronically a login screen will open where you will have to sign in with your Net-ID. After logging in, a new screen will open and an SMS will be sent to your mobile phone.
The message will contain an access code. Enter the access code in the new screen and click on Confirm. The grades are now signed, the status is now completed and the results can be seen by students.
If Sign manually is accidentally clicked, a PDF will be created. See Sign Manually for further instructions.
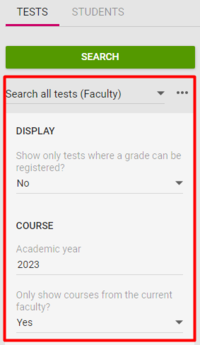
To still be able to sign electronically, select the Back to overview button and recall the relevant course. Make sure the Show only students for whom grades may be entered field is set to No.
Select one or more students, choose Correct grade, and confirm.
It is now possible to rechoose Sign electronically.
-
Signing manually is a back-up option. Please do not use it if signing electronically is available. This option requires multiple extra steps that can result in serious delay.
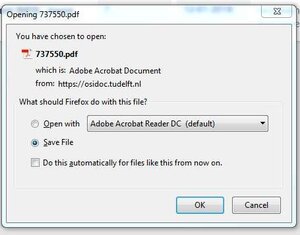
After clicking on the button Sign manually a pop-up will appear in order to generate a PDF:
The pdf can be sent to send an e-mail to the Administration office of your corresponding faculty: SPA-...@tudelft.nl. The correct address can be found at https://www.tudelft.nl/en/student/contact/study-programme-administration.
-
Saved results (Pending) can always be signed later. On the dashboard you can find the number of grade lists that still have to be signed. In this case it is 3 (see below). By clicking this number, a new screen will open.
This screen will only show the pending grade lists. On the right side of each test you will see a . . . button (see below). This button will give you the option to either sign the test Electronically or Manually, or go to the detailed test screen.
There is also the option to sign multiple pending grade lists at the same time (see below) . Click on <Make Selection>, and check the boxes of the grade lists you want to sign.
Then click either Sign Electronically or Sign Manually.
Course options
-
Only people that are registered as responsible lecturer in Osiris are able to generate a list of participants for a course.
Follow the steps below to Generate a PDF of participants in a course. The PDF contains the columns: Student number, Name, Degree Program, Degree, Exam type and F/P (Full-time or Part-time student). The list is divided per period and if applicable per group.
- Log in to OSIRIS Docent via https://osidoc.tudelft.nl
Use Google Chrome or Firefox as internet browser.
Lecturers from Leiden University need to use a guest account.
- Click on Grade to show your courses.
- Find the desired course. Optionally use the filters underneath the Search button.
- Click on the three bullets on the top-left of the course and select Print participants per instructional mode group.
- OSIRIS will generate a PDF that can download.
Exam options
-
Students can register for an exam until six calendar days before the exam. Therefore, the participant list is complete only five calendar days before the exam.
Follow the steps below to generate an exam participants list from Osiris:
- Log in to Osiris Begeleider via https://osidoc.tudelft.nl
Use Google Chrome or Firefox as your internet browser. Using a different internet browser may result in a blank participant list.
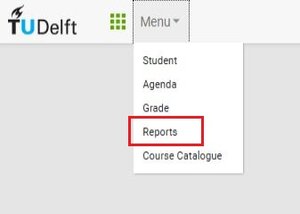
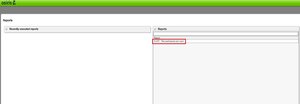
- Click on Menu and select Reports.
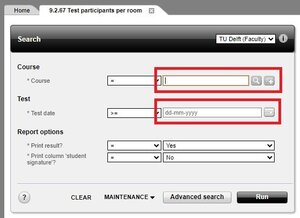
- Click on report 9.2.67 – Test participants per room to open it.
- Fill your Course code and exam date (format dd-mm-yyyy). Both are required!
- Select which type of Report you would like to generate:
- Test participations per room (PDF/Excel).
Nr (Line number), Naam (First name, Last name), Student number, (ET- Extra Time), A (Student present), TI (Exam handed in).
This type exports two columns side-by-side with the same formatting. The exports is always in Dutch.
- Test participations per room extended (Excel)
Nr (Line number), Naam (Last name + Initials (+ prefixes)), Student number, ET (Extra Time), empty field.
Use this one if you need email addresses and/or a column for students with Extra Time. The export is always in Dutch.
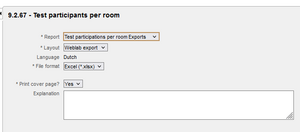
- Test participations per room Exports (Excel (html)/ Excel (xlsx))
Customize your header:
- Weblab export header: Student number, Naam (Last name + Initials (+ prefixes)), exam room, ET (Extra Time)
- Grasple export header: Naam (First name (+ prefixes) + Last name), e-mail, student number, ET (Extra Time)
- Select the Format in which you would like the report.
- Excel (*.xlsx)
- Click on Run.
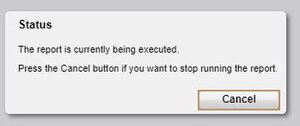
The following screen (pictured below) will appear.
Generating the report will take approximately one minute.
Other grading options
-
It is still possible to correct final grades (completed). This can be done within a period of 35 days after signing the grade. To correct a final grade, take the following steps:
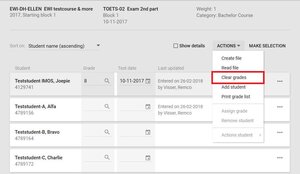
- Go to the test’s screen by clicking on the desired test*. Now you should see the screen where you could enter the grades and test dates of the students.
- Completed grades are not automatically shown on this screen. In order to see these results, change the "show only students for whom grades may be entered?" to a No. (see below)
*If you cannot find the desired test, you might need to change the filters on the left side of the screen and press the Search button.
- Click on the three dots ( . . . ), next to the result and click on Correct grade.
The status of the result will change from Complete to Pending and you will be able to change it.
You will have to Sign the grade again after making changes to it!
After the 35 day period, you cannot change the grades yourself. In this case, ask the Study Programme Administration to change the grades for you.
Support
-
For questions about grades, please contact the Study Programme Administration (SPA). For example updating grades after the 35 day period since the grade is electronically signed and final. You can contact SPA via the e-mail address for your faculty:
-
For all functional and technical questions please contact Teaching-support@tudelft.nl.
-
For questions concerning the curriculum/the program and changes in Osiris and other organisational matters (for example, changing the instructor/course manager, adding courses, or issues with course names), please contact your programme coordinator:
Aerospace Engineering (AE) education-ae@tudelft.nl Applied Sciences (AS) O&S TNW Architecture & the Built Environment (ABE) Cousebase beheerder BK Civil Engineering and Geosciences (CEG) EducationSupport-CEG@tudelft.nl Electrical Engineering, Mathematics & Computer Science (EEMCS) Programmecoordinator-EEMCS@tudelft.nl Industrial Design Engineering (IDE) coe-ide@tudelft.nl Mechanical Engineering (ME) onderwijsorganisatie-ME@tudelft.nl Technology, Policy and Management (TPM) OS-TBM@tudelft.nl

